For today's post I thought I'd give some much needed love to
my 40k Ork army and roll out a battle report. The reason behind this is, for
the first time in a long time, I've been able to play a mass battle game with
everything on the table fully painted. Combined with the scenery, a great
opponent and a few beers I was looking forward to seeing what cinematic moments
arose, and whether I could still play Warhammer 40k after a year without.
A big thanks to Mike for letting me take pictures and also a
massive thumbs up to his painted Black Templar army. A great paint job that
made this battle a joy to play.
MISSION & DEPLOYMENT
With the board set out as a city under bombardment we set
about laying our plans for conquest. 6 objective markers were put down, 3 in
Mike's deployment area hidden within the ruins, and the other 3 on my half of
the board slightly further up the table, 2 in ruins and the other behind a barricade.
With the table set, it was on to deployment.


Mike set up first, but had about half his army arriving via
orbital drop pod so his initial set up was pretty quick. 2 ten man squads of
marines were deployed close to the objectives in the ruins whilst the third
objective was taken by a five man team of scouts with sniper rifles. Mike's
General, The Chapter Master was also set up with the central squad of marines.
My deployment was geared around the knowledge I would be
going second, but I would also need to play to my strengths i.e. Aggressive as
all HELL! With that in mind, I had the Warboss and his rentinue mounted on the
Megadoof Wagon set up just left of the centre building with a truck mounted mob
of boys close by to act as escort. Plan was to storm up the field as fast as
possible and then start causing damage to take the objectives on Mike's half of
the bored. A second truck mounted mob took my right flank for the same job and
then the Loota boys led by the Big Mek took up firing position in the upper
floors of the central building. 3 mobs of gretchin would act as objective
holders for the army. Whilst everyone else raced off across the board for a scrap,
the gretchin would follow in their wake and hold ground. I also had reserves coming on the flanks, but
they wouldn't appear until later in the game.

A quick rundown on the reserves, Mike would receive 2 drop
pod landings in turn 1 and the final pod in turn 2. So I had a fair bit of
heavy duty hitter to look forward to in the form of (left to right) 5 man squad
of Assault Terminators, 3 Centurions led by the Emperor's Champion and a
Venerable Dreadnought.

My own reserves, though not as heavy duty, made up for this
in speed and outflanking positions. I wouldn't get the 2 buggy squadrons until
turn 2 or later as they would be turning up randomly, but when they did I was
looking forward to seeing some wreck marine formations.

OPENING SALVOS(turn1)
Mike's drop pods hit home right in front of my lines, it
looked like Mike was going to bring the fight to me, which suited me just fine.
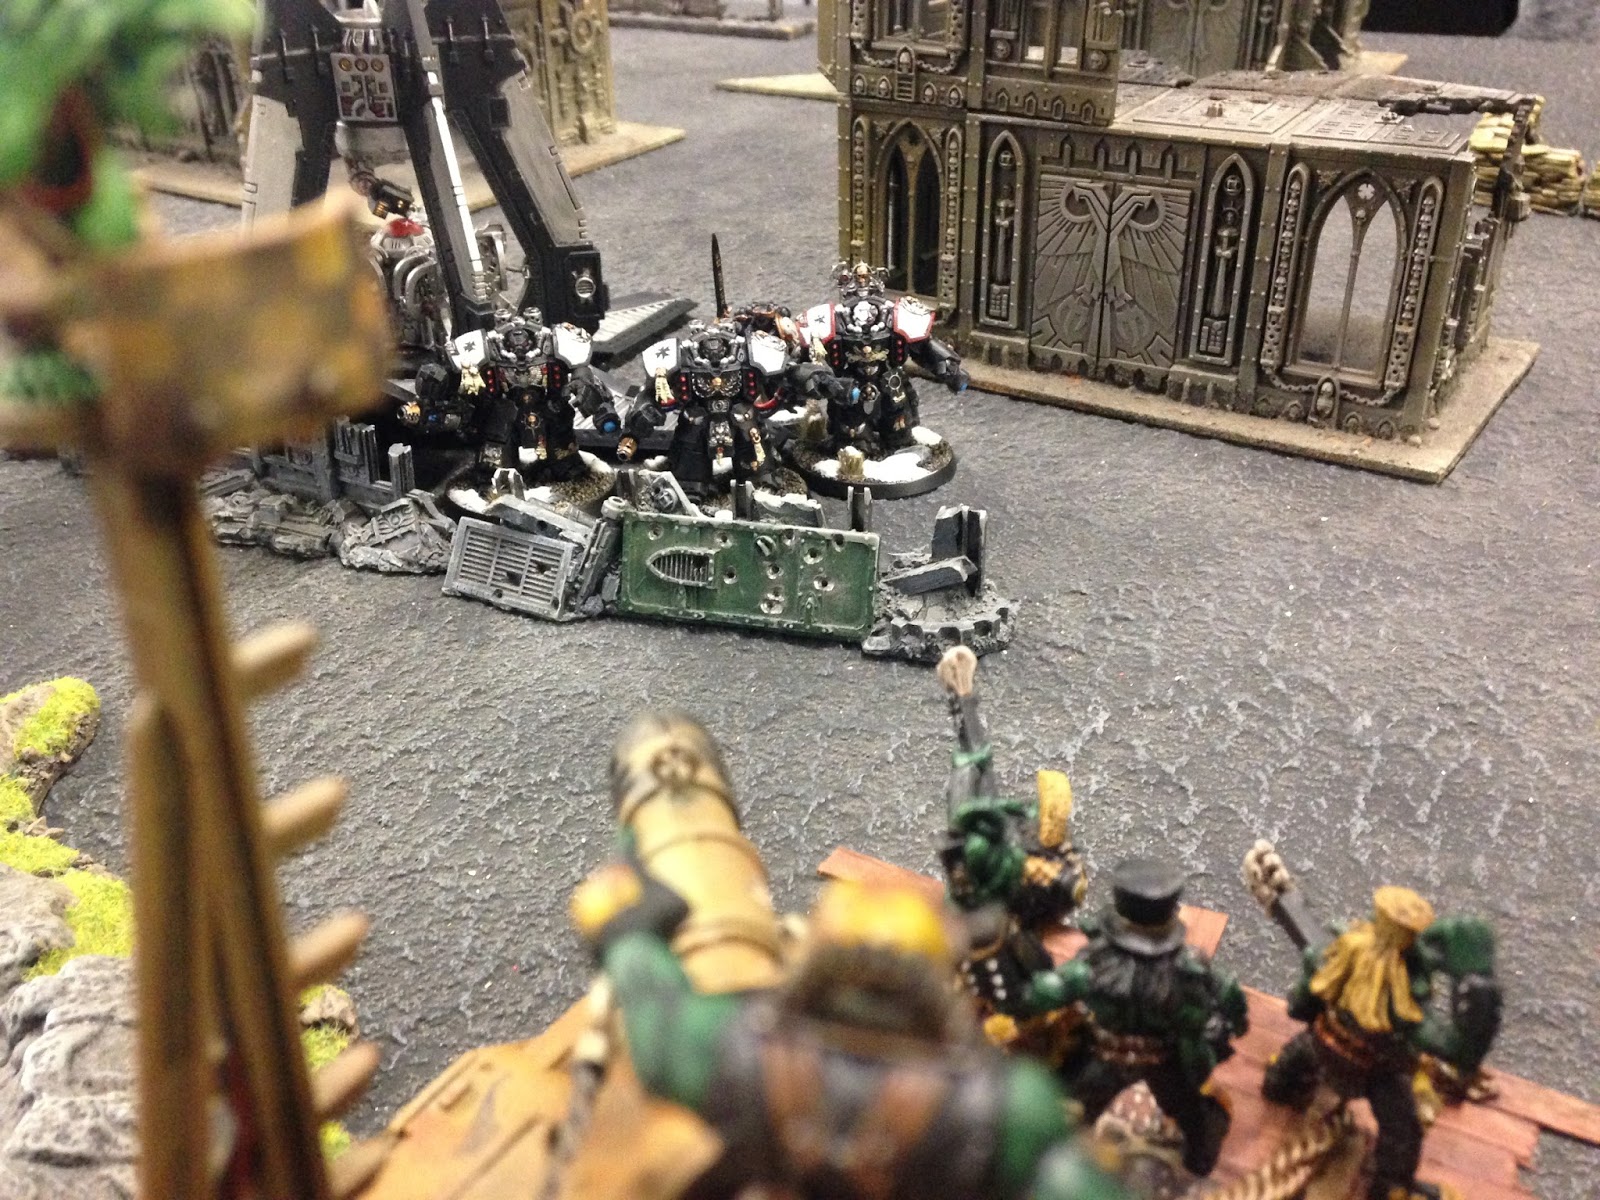
The Assault Terminators land just off centre looking to take the barricades and
the objective situated there. On my left flank, the drop pod containing the
centurions scattered from its intended centre target and landed amongst some
other barricades, but ultimately leaving the squad exposed to counter attack.

Meanwhile, across the battlefield, the 2 squads of marines
advanced away from their claimed objectives with eyes to take the objectives
further in to the city. This did leave the central squad dangerously exposed
however, clearly Mike had plans about
removing my big guns before I had a chance to use them.

This was not to be. A
severe salvo from the Centurion Grav weaponry crippled the Megadoof Wagon
almost instantly, but the band kept playing and the Wagon survived though now
it was immobilised so it wasn't going anywhere. Then again, it didn't need to as it had already lined up it's first shot...

Concentrated fire from the
snipers and the marine squads attempted to knock out a few Loota boys, but the
crafty ork heavy weapon boys were dug in deep. The ample cover provided by the
building the orks were in meant that even a direct hit from the Chapter
Master's ordered orbital strike didn't kill a single ork.
The orks laughed off the worst of the marines' fire power
and now threw their own in response. The truck mob on my right flank hit the
nitro and pelted up the street towards the marines' forward position.

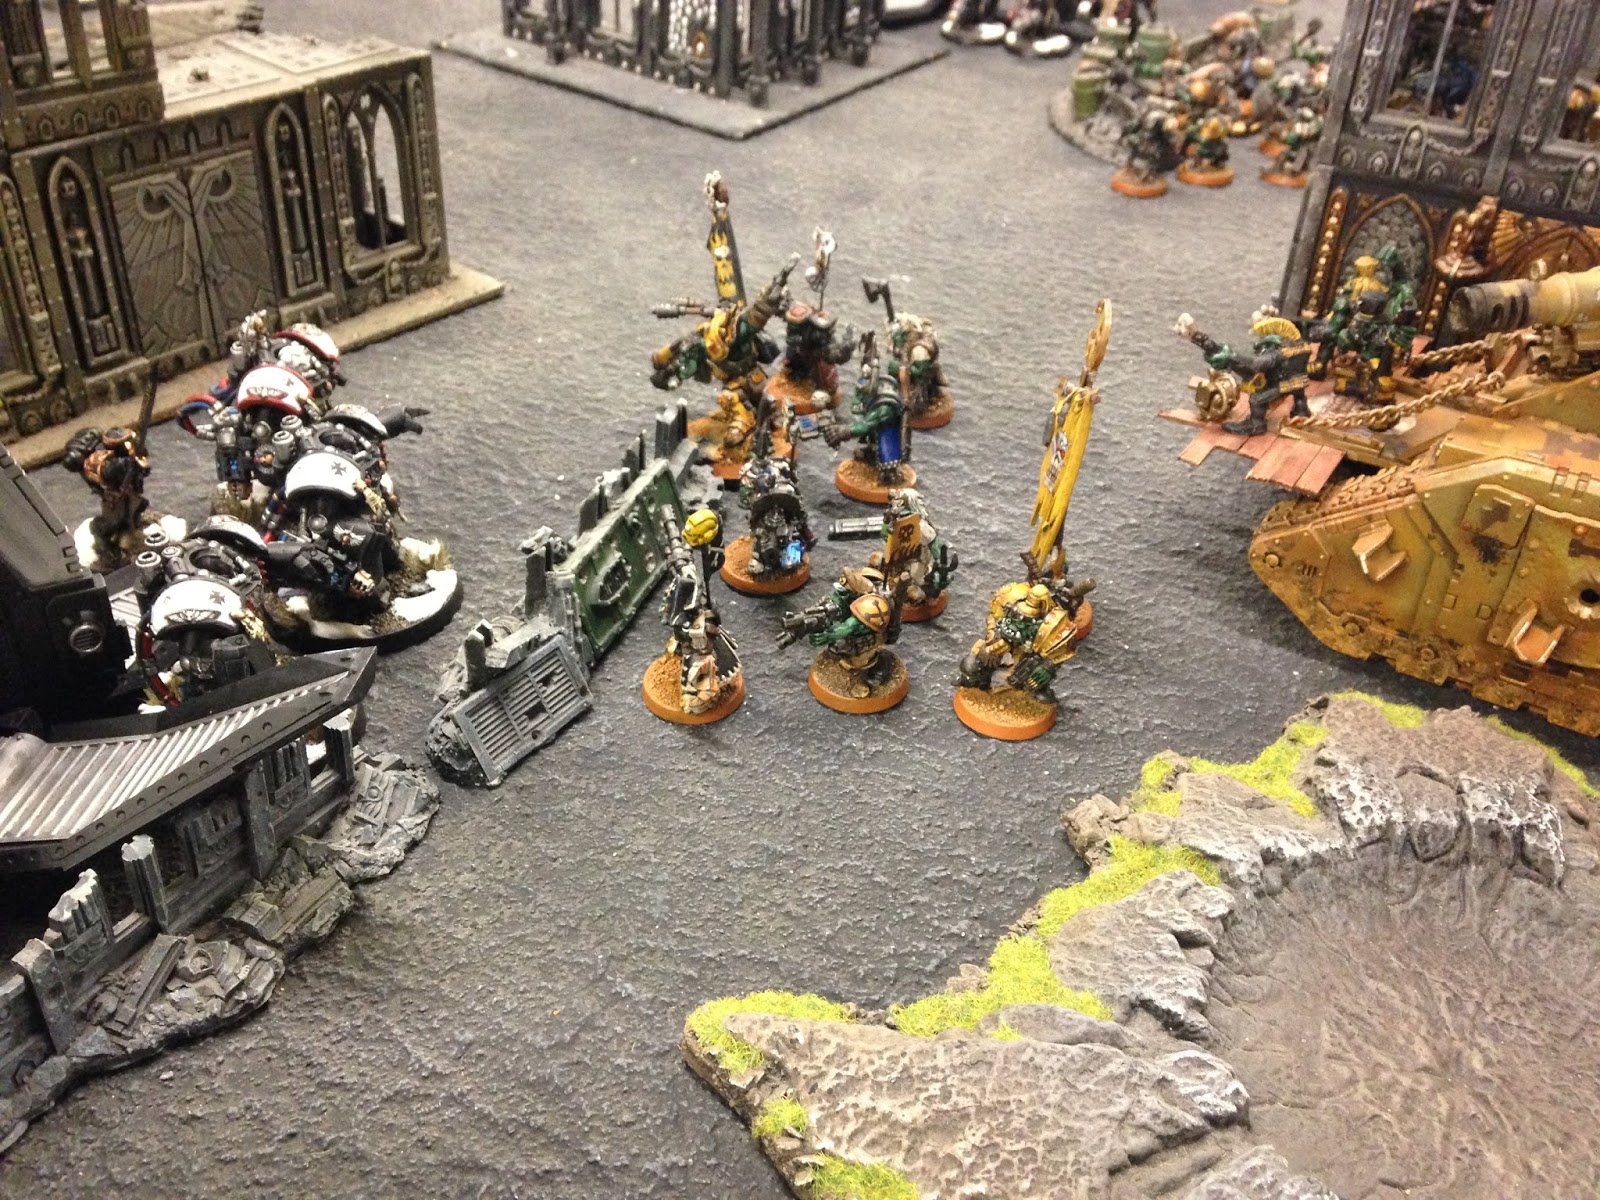
Next up were the escort truck boys. Seeing the Megadoof
Wagon's suspension crack and drop like 250 ton of armoured brick, the boys
decided they didn't want to be anywhere near the Warboss when he got out of
there and started looking for someone to blame. Instead the boys leapt off the
speeding truck and charged the Assault Terminators. Despite a hailstorm of
bullets, broken bottles and low yield explosives, the Terminator squad held
their ground, locked shields and took the charge.


Having had his ride crippled, the Warboss was out for blood,
even if he had to walk across the street to get it. Bailing out of the Megadoof
Wagon, the Warboss and his bodyguard barrelled towards the Centurions for
revenge. The Warboss' squad took casualties from incoming fire, but was certain
the Centurions never fired a shot. Glaring back, it appeared that the Big Mek
was responsible for the freak friendly fire accident.

Despite their unexpected losses, the Brute squad of orks, led
by the Warboss, hit home against the Centurions like a meteor. The Warboss
brushed past a challenge presented by the Emperor's Champion, thinking the
smaller marine unworthy of his time. Savouring the prospect of a bigger kill.
Out classed by shear brute force, the Centurions were cut down, but the
Champion held his ground against the remaining orks, carving up several of the Brutes
and staring down the Warboss.


No comments:
Post a Comment